
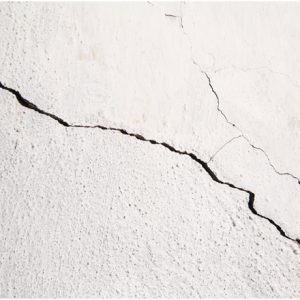
There are two types of cracks that occur in walls or ceilings:
- Hairline cracks
- Structural cracks
Faulty workmanship, defective materials, head banging, or drying shrinkage cause hairline cracks. While movement in the structure or frame of the building causes structural cracks.
In houses with brick walls, structural movement might be a once-only thing that occurs when the new house settles onto its foundations (called settlement) or it might be an ongoing problem, caused by ground movement (called subsidence).
Subsidence is not usually the expensive horror story that some people make out. Softening of the ground due to leaking drains can cause it, or seasonal shrinkage of the ground in dry summers. It can be fixed, but if you suspect your home might be affected by subsidence, get it checked out by a qualified structural engineer.
In timber-framed houses, movement is the result of shrinking and swelling of the wooden structural members, such as studs or joists. This movement occurs seasonally, when changes in the temperature and humidity cause fluctuations in the moisture content of the framing timber. Cracks filled with filler or other brittle patching compound recur with these movements.
Wallboard or taping compound is used to cover taped joints in dry lining (plasterboard that’s not plastered yet). Filler is used to fill holes and cracks in plastered solid or plasterboard walls. Wallboard is the larger size of plasterboard, used for walls, to distinguish it from plank, a smaller size used for ceilings.
Here’s what you need to repair a crack in a plasterboard wall or ceiling:
- Filler knife
- Scraper, taping knife, or plastering trowel
- Premixed wallboard (plasterboard) compound and fibre (or paper) plasterboard tape
- Plastic container to hold the taping compound or filler
- Fine sandpaper
Cracks in corners may be due to a build-up of taping compound or paint. These hairline cracks are in the excessively thick material; they don’t extend through to the reinforcing tape itself. To repair these surface cracks, fold a piece of sandpaper over the end of a scraper or taping knife and carefully sand away the excess material. By folding the sandpaper over the knife blade, you can keep the sanded surface smooth and flat; if you sand a soft, flat surface like plasterboard with your fingers backing the sandpaper, you may leave an uneven surface. Do not sand through the wallboard tape. After removing the excess material, use a small paintbrush to touch up the corner.Follow these steps, to repair a deeper crack with wallboard tape:
- Clean out the interior of the crack so that no loose material is present.
- Apply a light coating of wallboard compound to the crack. Premixed wallboard compound contains about 50 per cent water by volume, so it shrinks as it dries. For this reason, several applications are needed to build up a surface and overcome shrinkage.
- Embed the paper tape in the wallboard compound and scrape a scraper or filler knife along the joint to remove excess wallboard compound. Don’t leave wrinkles in the tape: If the crack isn’t straight, cut the tape where the crack zigzags and apply the tape so that it’s centred over the crack.
- Apply a thin coat of wallboard compound over the wallboard tape and smooth it with a wide taping knife to minimise sanding.
- Let the patch dry completely.
- When the wallboard tape and first coat are dry, use a scraper, taping knife, or trowel to apply a second, smoothing coat. This application is intended to smooth and conceal the tape. Don’t pile wallboard compound in a thick coat over the tape; you’re not decorating a cake!
- Let this application dry completely and repeat with a third coat.
- Use a sanding block to smooth the repaired area.




Leave a comment
All comments are moderated before being published.
This site is protected by reCAPTCHA and the Google Privacy Policy and Terms of Service apply.